
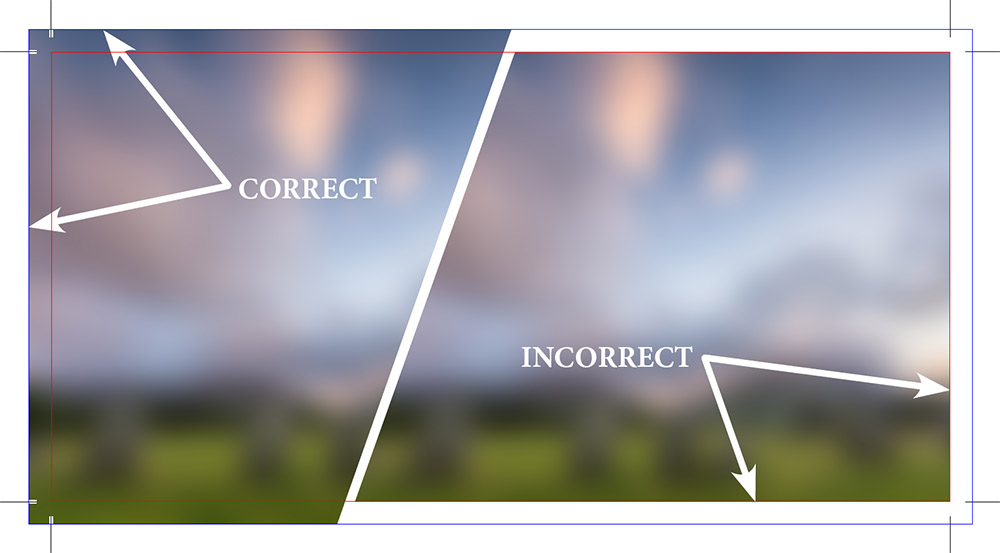
Here is an image that illustrates how bleeds should (and should not) appear in your final PDF:
(In order to make the bleed and trim boxes visible in Acrobat like in the image below: "Edit", "Preferences...", "Page Display", check "Show art, trim & bleed boxes")
Now that you can see an example of how bleeds should look in your final document, here are the steps to set up bleeds using Microsoft Publisher.
Unfortunately, Microsoft Publisher does not make it easy to create a document with proper bleeds, but the functionality does exist within Publisher, although it can be difficult to find. To creat a bleed, you need to set your publication to print on a sheet of paper larger than the finshed publication page (more on that later). Since we're producing a PDF, you won't print on an actual piece of paper, but basically a virtual piece of paper who's size is dictated in the print dialog that will produce a PDF.
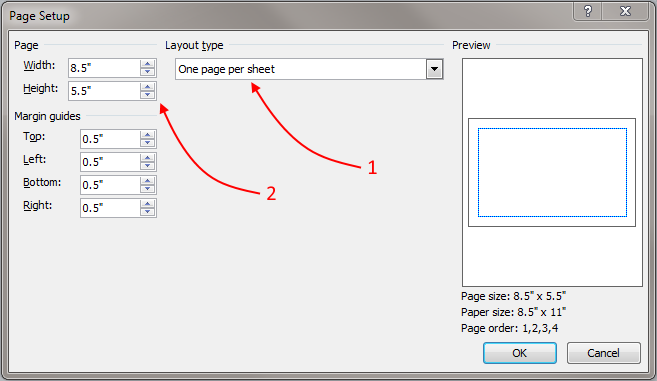
In this example, I will be creating a 5.5" x 8.5" document with 1/8" bleeds. This results in artwork that is at least 5.75" x 8.75".
To get started, you need to edit your Page Setup. To do this:
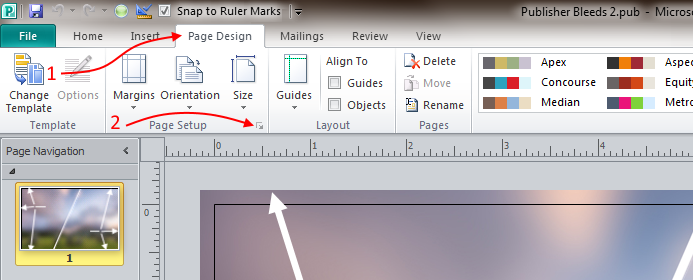
In Page Setup, two things need to be set.
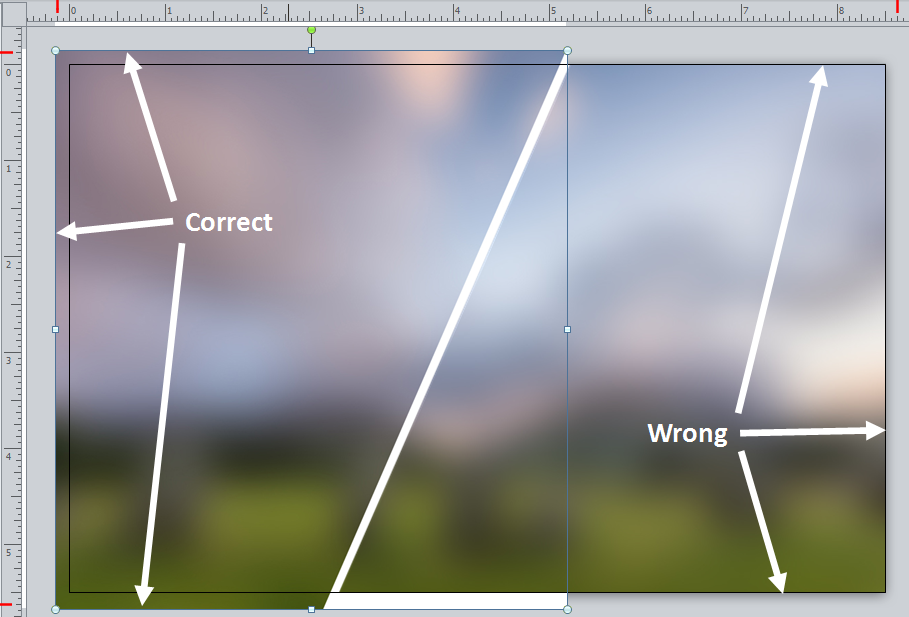
Now that you have the page set up properly, you need to position your elements on the page so that they extend beyond the edge of your layout at least a 1/8" wherever bleeds are desired. Publisher does not provide a very friendly view of your layout for bleeding objects, and you'll have to use the rulers. (Click the View ribbon and check Rulers if the rulers are not turned on.) In the example image below there is a black box showing the boundaries of the 8.5" x 5.5" layout. I had to manually draw the black box for illustrative purpose since Publisher does not offer any such functionality. Observe the red marks that I manually drew on the ruler for illustrative purposes. There red marks represent where the bleeding art should be extended to in order to achieve a proper bleed. You can see that I have achieved this by looking at the white on the rulers, which represents the position of the selected object (the left object). You can see that the right object, that is not properly positioned for bleeds, does not reach the red mark that I drew on the right of the ruler at 8-5/8" (8-1/2" layout + 1/8" bleed area).
When you are done designing your artwork, it is time to create a print ready PDF. There are two ways to do this out of Publisher.
Printing to a PDF printer to produce your final PDF will usually produce a better result than the Publisher Save As method (Method 2 described below). The result depends on the artwork and what PDF printer you are using. If the PDF produced with the Save As method is unsatisfactory (or impossible to produce) then you should try this method.
If you already have Adobe Acrobat Pro (any version) then you probably already have a printer installed in you system called "Adobe PDF." This PDF producing printer can be used as an alternate method of converting your artwork into a PDF out of Publisher (or any other program that has the ability to print).
If you are going to use the Adobe PDF printer that is already installed in your system, you should first install our .joboptions file. You can get the AD-VantageMarketing.joboptions file here (right click and Save As). If you don't know how to install the .joboptions file see our guide: Install an Adobe .joboptions File.
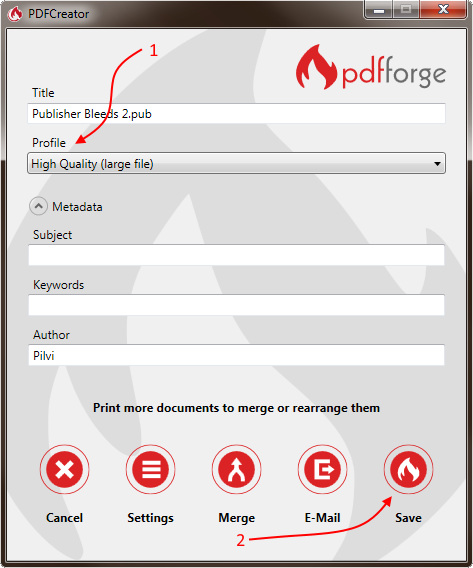
If you don't have a PDF printer already installed in your system, you can install a free one. First I recommend PDFCreator. It has more options and seems to produce higher quality PDFs than most of the other free PDF printers. If you do use PDFCreator, be sure to use the "High Quality (large file)" Profile for the best quality. You could get the installer from the pdfforge website, or for the easiest installation experience, I recommend you use the Ninite installer: Ninite PDFCreator Installer (conveniently provided by Ninite.com).
Alternatively, you could install CutePDF Writer, which you could get from the CutePDF website, and again, I recommend that you use the Ninite installer, which you can get here: Ninite CutePDF Installer.
Once you have a PDF printer installed, click File, Print and then:
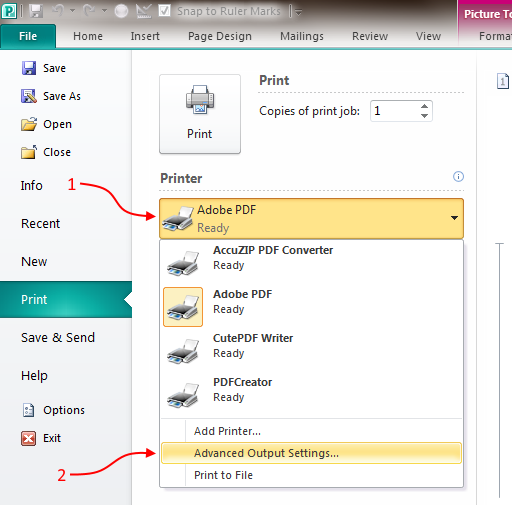
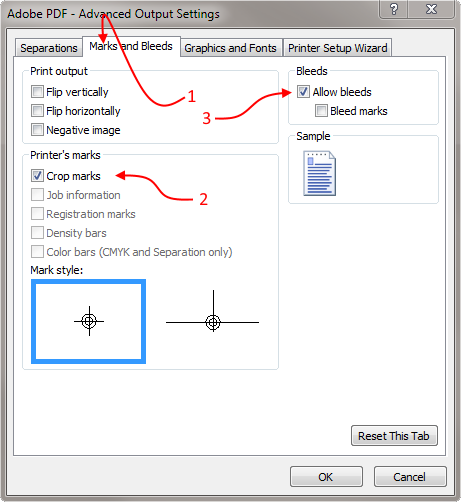
This will bring up the Advanced Output Settings. Make these selections:
Click OK in the Advanced Output Settings window.
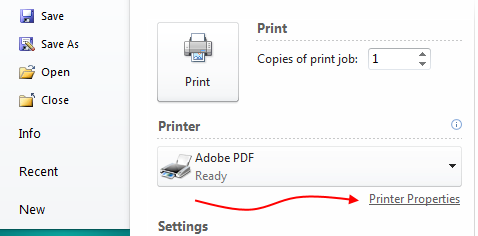
This will bring you back to the Print screen. If you are printing using Adobe PDF, click Printer Properties (pictured below).
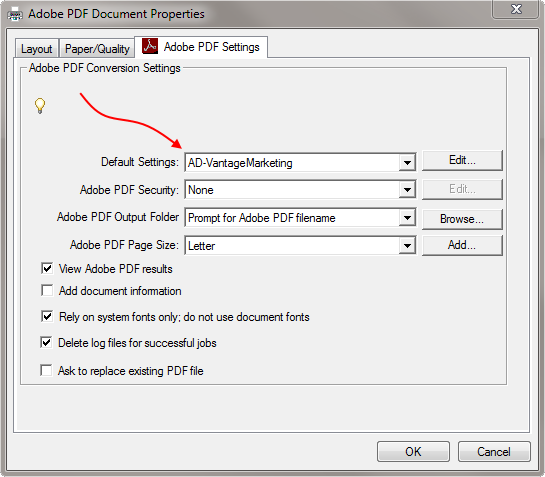
This will bring up Adobe PDF Document Properties. Set the Default Settings to AD-VantageMarketing or to Press Quality if you don't have AD-VantageMarketing available to you. Our AD-VantageMarketing.joboptions will give you the best quality. See Install an Adobe .joboptions File if you want to install it.
Then click OK on the Adobe PDF Document Properties window.
This will once again bring you back to the Print screen. Double check that the page size and orientation (portrait or landscape) is properly set to a size and orientation that is at least 1/2" larger than your artwork in both dimensions (to leave room for bleeds and crop marks). Now you can finally click Print. What happens next depends on what PDF printer you are using:
If you are using Adobe PDF or CutePDF Writer:
If you are using PDFCreator:
The resulting file should be a PDF with properly formatted bleeds. Now is the time to send us the PDF file and we'll look it over for you. You can use our web-based upload here or attach it to an email.
All done!... unless you had trouble and need Method 2.
From experience, it appears that the Save As PDF method in Publisher produces the LOWEST QUALITY PDF as compared to the print to PDF methods. This is how it's done:
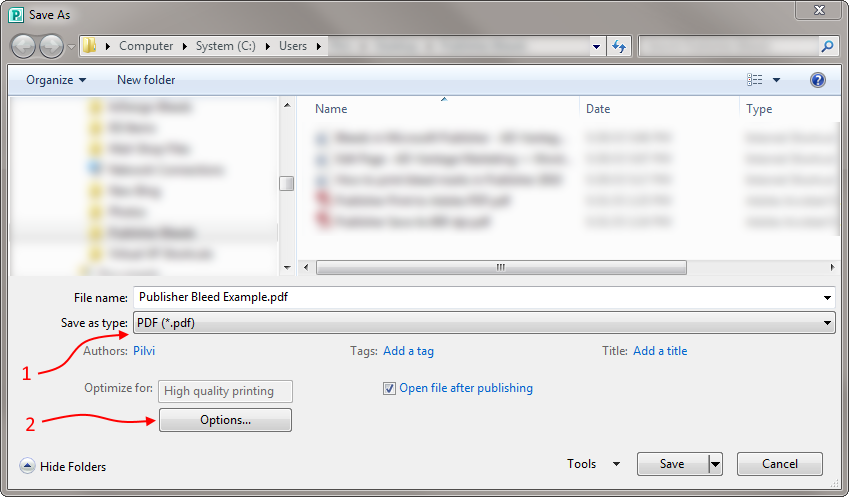
Click File, Save As, and you'll be presented with the dialog box picture below.
And you'll be presented with another window called Publish Options.
In the Publish Options window you should use the settings pictured below:
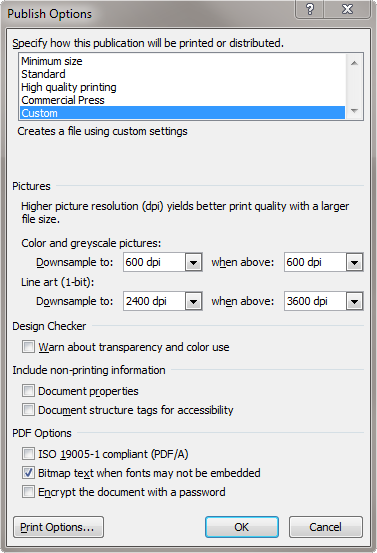
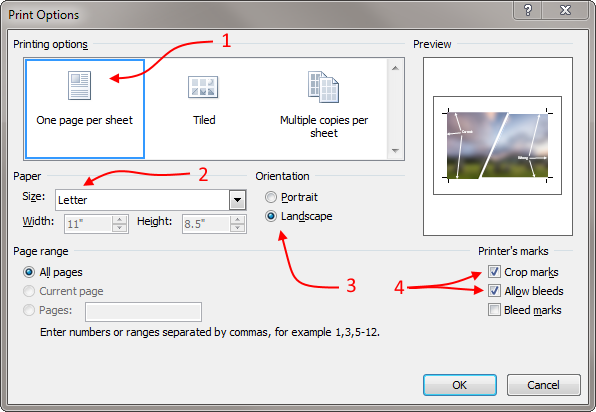
Then click Print Options... (another window!) and configure these options:
Almost done!
Click OK to the Print Options, OK to the Publish Options, and once you have decided on a file name and location in the Save As window, click Save. If you have Open file after publishing checked, your finished PDF will automatically open in your default PDF viewing program.
The resulting file should be a PDF with properly formatted bleeds. Now is the time to send us the PDF file and we'll look it over for you.
You can use our web-based  or attach it to an email.
I have had mixed results using Method 2 (Save As) to produce a good PDF. A better PDF is usually produced when printing to a PDF printer: Method 1 (Print to PDF).
If you require additional help with artwork, see our Artwork Guidelines. If you want to know how to set up bleeds using other software, see our help articles regarding How to Set up Bleeds.