How to Set Up Bleeds in Canva
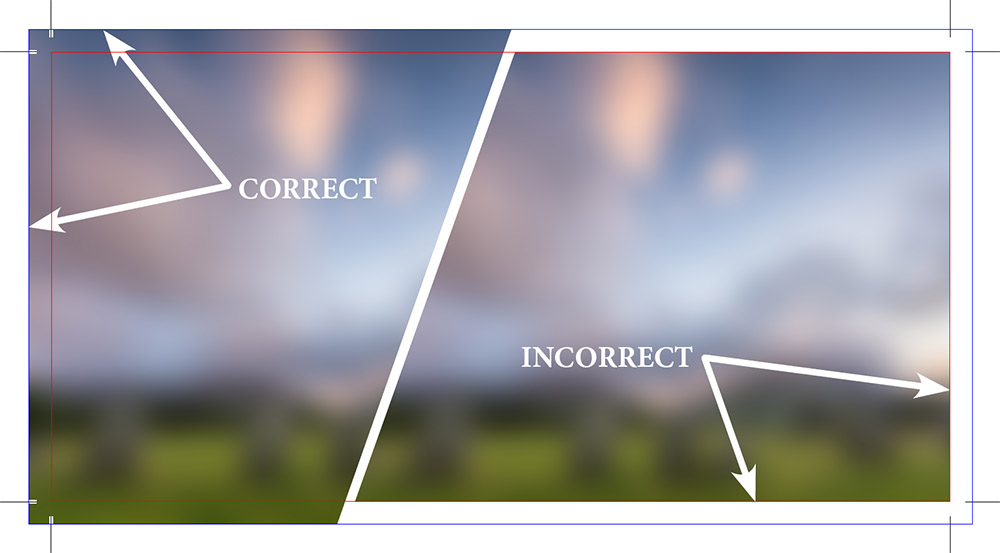
Here is an image that illustrates how bleeds should (and should not) appear in your final PDF:
(In order to make the bleed and trim boxes visible in Adobe Reader or Acrobat like in the image below: "Edit", "Preferences...", "Page Display", check "Show art, trim & bleed boxes")
Now that you can see an example of how bleeds should look in your final document, here are the steps to set up bleeds using Canva:
Step 1
Go to Canva.com (log in if you are not already) and create a new design or open an existing design.
|
Step 2
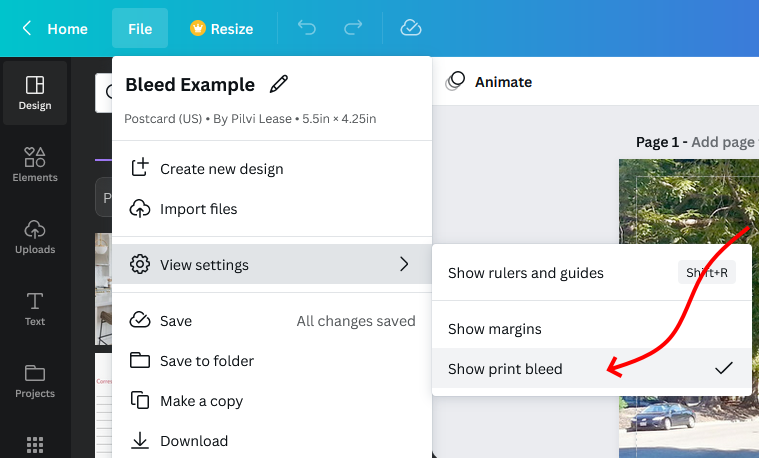
From the menu above the editor, click File and then Settings. Then select
Show print bleed. A border of broken lines will appear close to the edges of your design. This bleed margin is fixed at 1/8" and cannot be adjusted.
|
|
Step 1
Go to Canva.com (log in if you are not already) and create a new design or open an existing design.
Step 2
From the menu above the editor, click File and then Settings. Then select
Show print bleed. A border of broken lines will appear close to the edges of your design. This bleed margin is fixed at 1/8" and cannot be adjusted.
Step 3
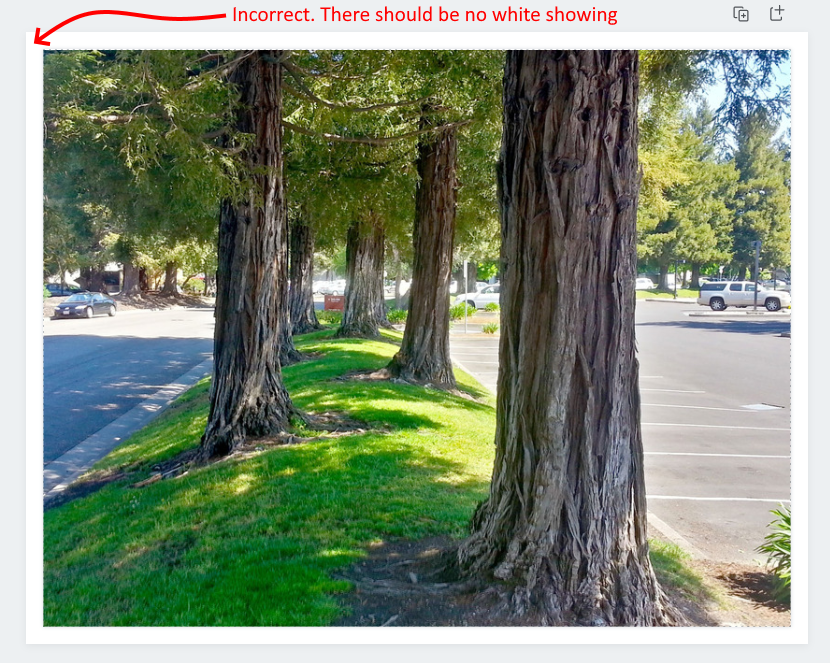
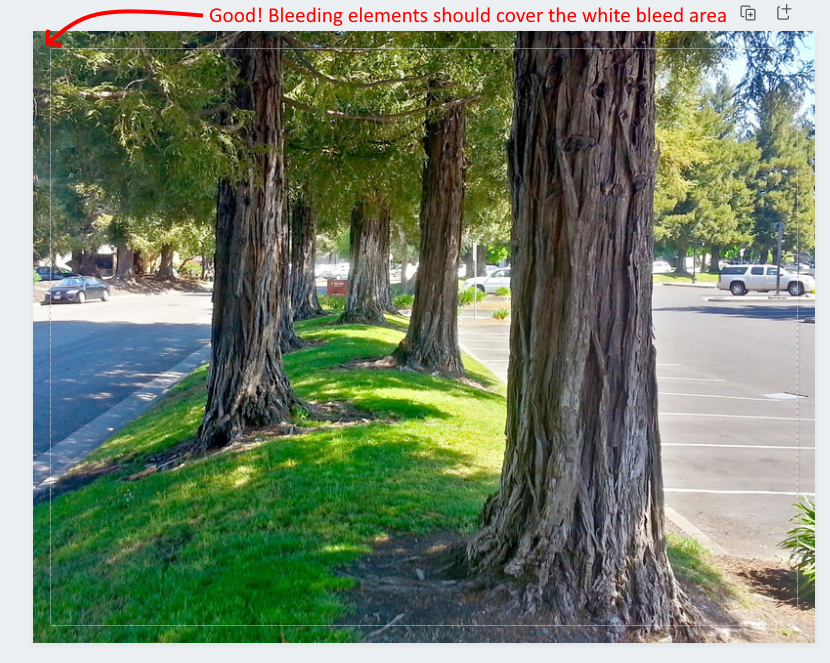
Now that you have enabled bleeds in Canva, look at the examples below that show an incorrect bleed vs. a correct one.
If you see white gaps around the design edges, resize or stretch your image element(s) to cover them.
|
|
Step 3
Now that you have enabled bleeds in Canva, look at the examples below that show an incorrect bleed vs. a correct one.
If you see white gaps around the design edges, resize or stretch your image element(s) to cover them.
Step 4
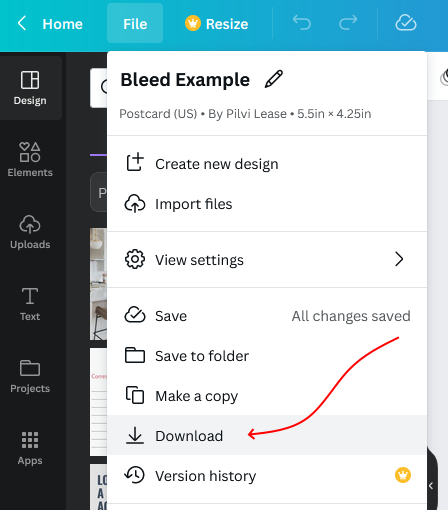
Once you are done designing your document (and now that you have properly set up your document for bleeds), perform the following steps:
- Click the File and then the Download button
- Change File type to PDF Print
- Check Crop marks and bleed
- Click the Download button at the bottom of the menu
- Save the file to your device
Here is an example PDF created in Canva with bleeds: Example
|
|
Step 4
Once you are done designing your document (and now that you have properly set up your document for bleeds), perform the following steps:
- Click the File and then the Download button
- Change File type to PDF Print
- Check Crop marks and bleed
- Click the Download button at the bottom of the menu
- Save the file to your device
Here is an example PDF created in Canva with bleeds: Example
Step 5
The resulting file should be a PDF with properly formatted bleeds. Now is the time to send us the PDF file and we'll look it over for you.
You can use our web-based  or attach it to an email.
If you require additional help with artwork, see our Artwork Guidelines. If you want to know how to set up bleeds using other software, see
our help articles regarding How to Set up Bleeds.
Step 5
The resulting file should be a PDF with properly formatted bleeds. Now is the time to send us the PDF file and we'll look it over for you.
You can use our web-based or attach it to an email.
If you require additional help with artwork, see our Artwork Guidelines. If you want to know how to set up bleeds using other software, see
our help articles regarding How to Set up Bleeds.